Your house feels too warm, too cold, or somehow both at the same time. You walk over to the thermostat and notice something is off. Maybe the screen is blank. Maybe it shows 72°F but your living room feels like 65°F. Maybe the system keeps turning on and off every few minutes. A thermostat not working correctly is one of the most common HVAC complaints homeowners face. The good news? Most thermostat problems have simple fixes you can handle yourself in under 30 minutes.
This guide walks you through every common thermostat malfunction, from dead displays to calibration drift to programming glitches. You will learn what causes each problem, how to diagnose it, and when it is time to call a professional instead of reaching for your toolbox.
Key Takeaways
- Dead batteries cause most blank screens — before assuming your thermostat is broken, swap in fresh AA or AAA batteries, which fixes roughly 80% of blank display issues.
- Location matters more than you think — a thermostat near a sunny window, kitchen, or exterior wall can read temperatures 3°F to 5°F off, making your HVAC system overwork or underperform.
- Calibration drift is normal over time — mechanical and digital thermostats can drift 1°F to 3°F from their actual reading after a few years of use.
- Dirty components cause erratic behavior — dust buildup inside the thermostat housing interferes with temperature sensors and electrical contacts.
- Wiring problems mimic thermostat failures — loose, corroded, or incorrectly connected wires at the thermostat base create symptoms that look like a broken unit but are actually electrical issues.
- Most thermostat issues cost $0 to $150 to fix — only about 15% of thermostat malfunctions require professional HVAC service or full unit replacement.
Why Is My Thermostat Screen Blank or Unresponsive?
Quick Answer: A blank thermostat screen usually means dead batteries, a tripped circuit breaker, or a blown fuse in your HVAC system. Start by replacing batteries. If that does not fix it, check the circuit breaker and the furnace power switch. These three steps resolve about 90% of blank screen cases.
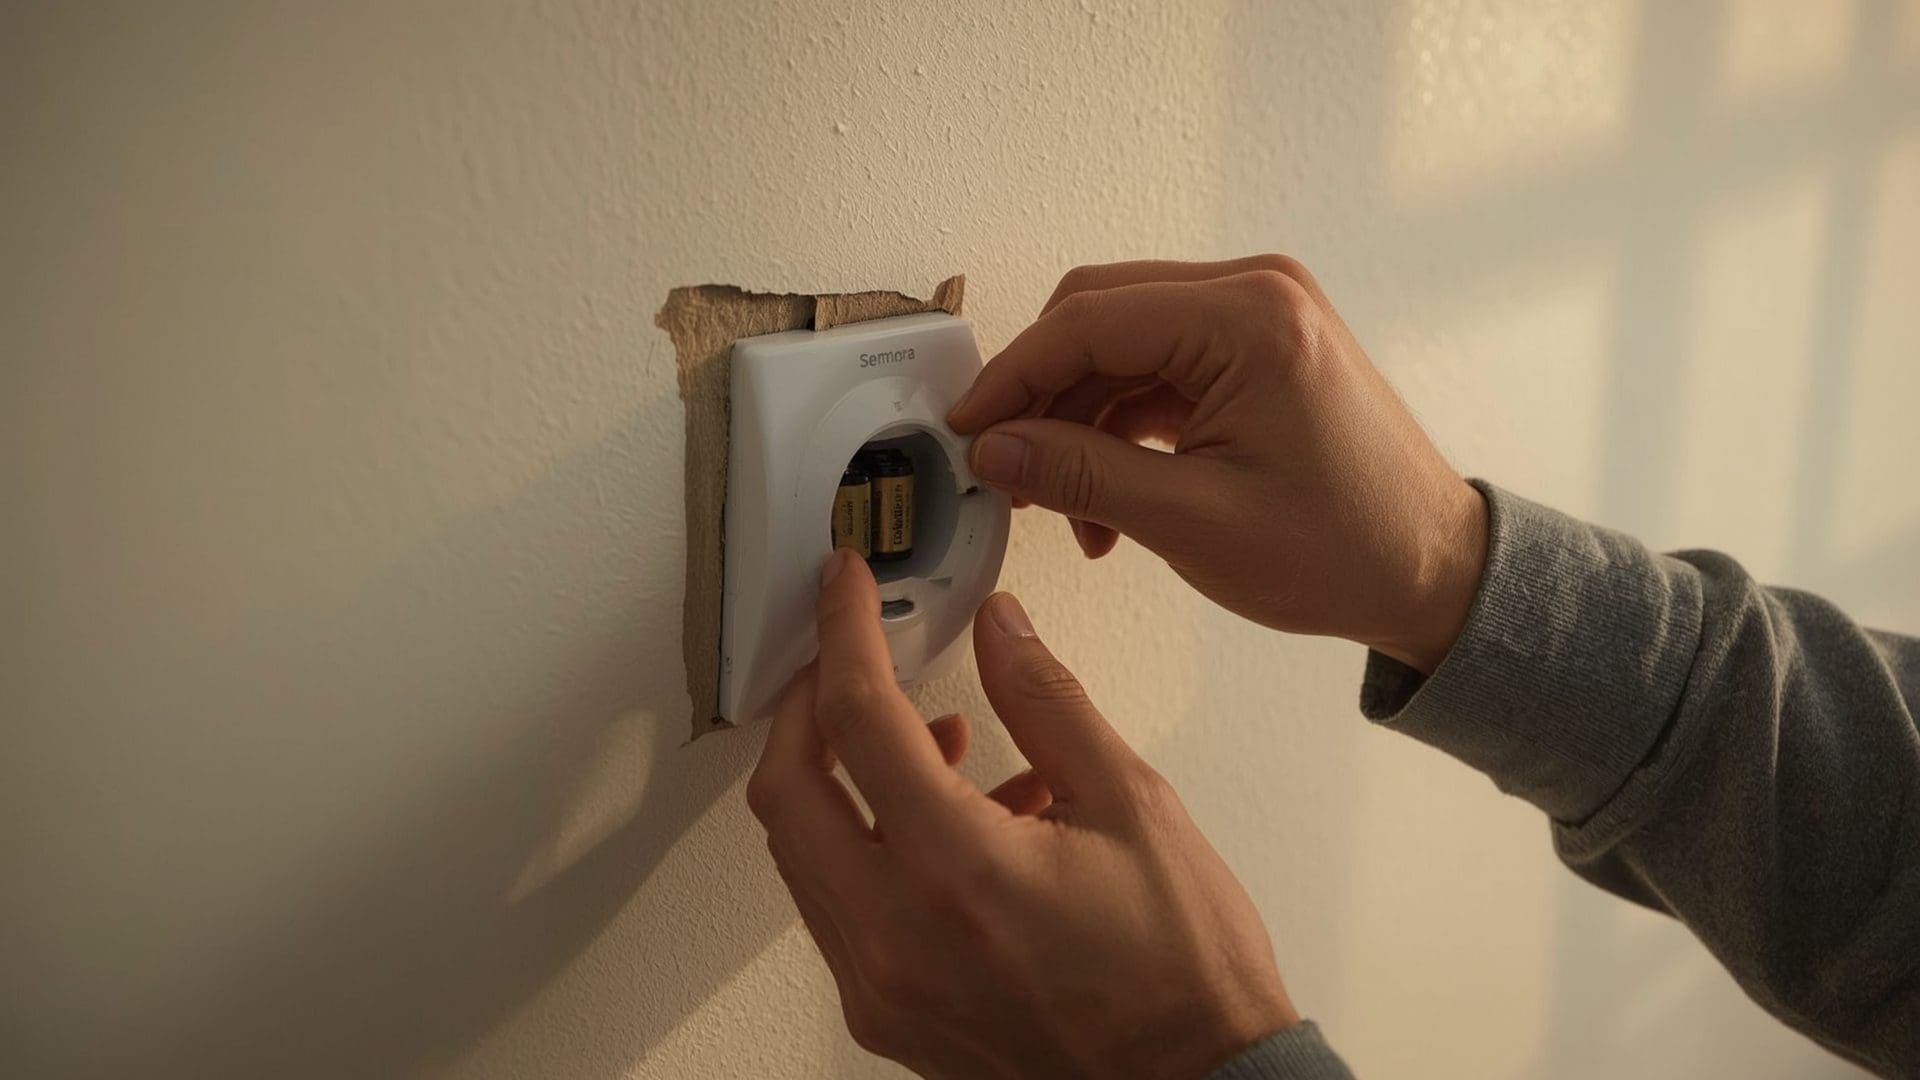
A completely dead thermostat is alarming, but the fix is usually the simplest one on this list. Battery-powered thermostats (including most programmable and smart models) rely on AA or AAA batteries that typically last 8 to 12 months. When they die, the screen goes blank and your HVAC system stops receiving commands.
Battery Replacement Steps
- Pull the thermostat faceplate straight off the wall mount (most models snap off).
- Locate the battery compartment on the back or side of the faceplate.
- Replace all batteries at once with fresh, name-brand alkaline batteries.
- Snap the faceplate back onto the mount and wait 30 seconds for the display to boot.
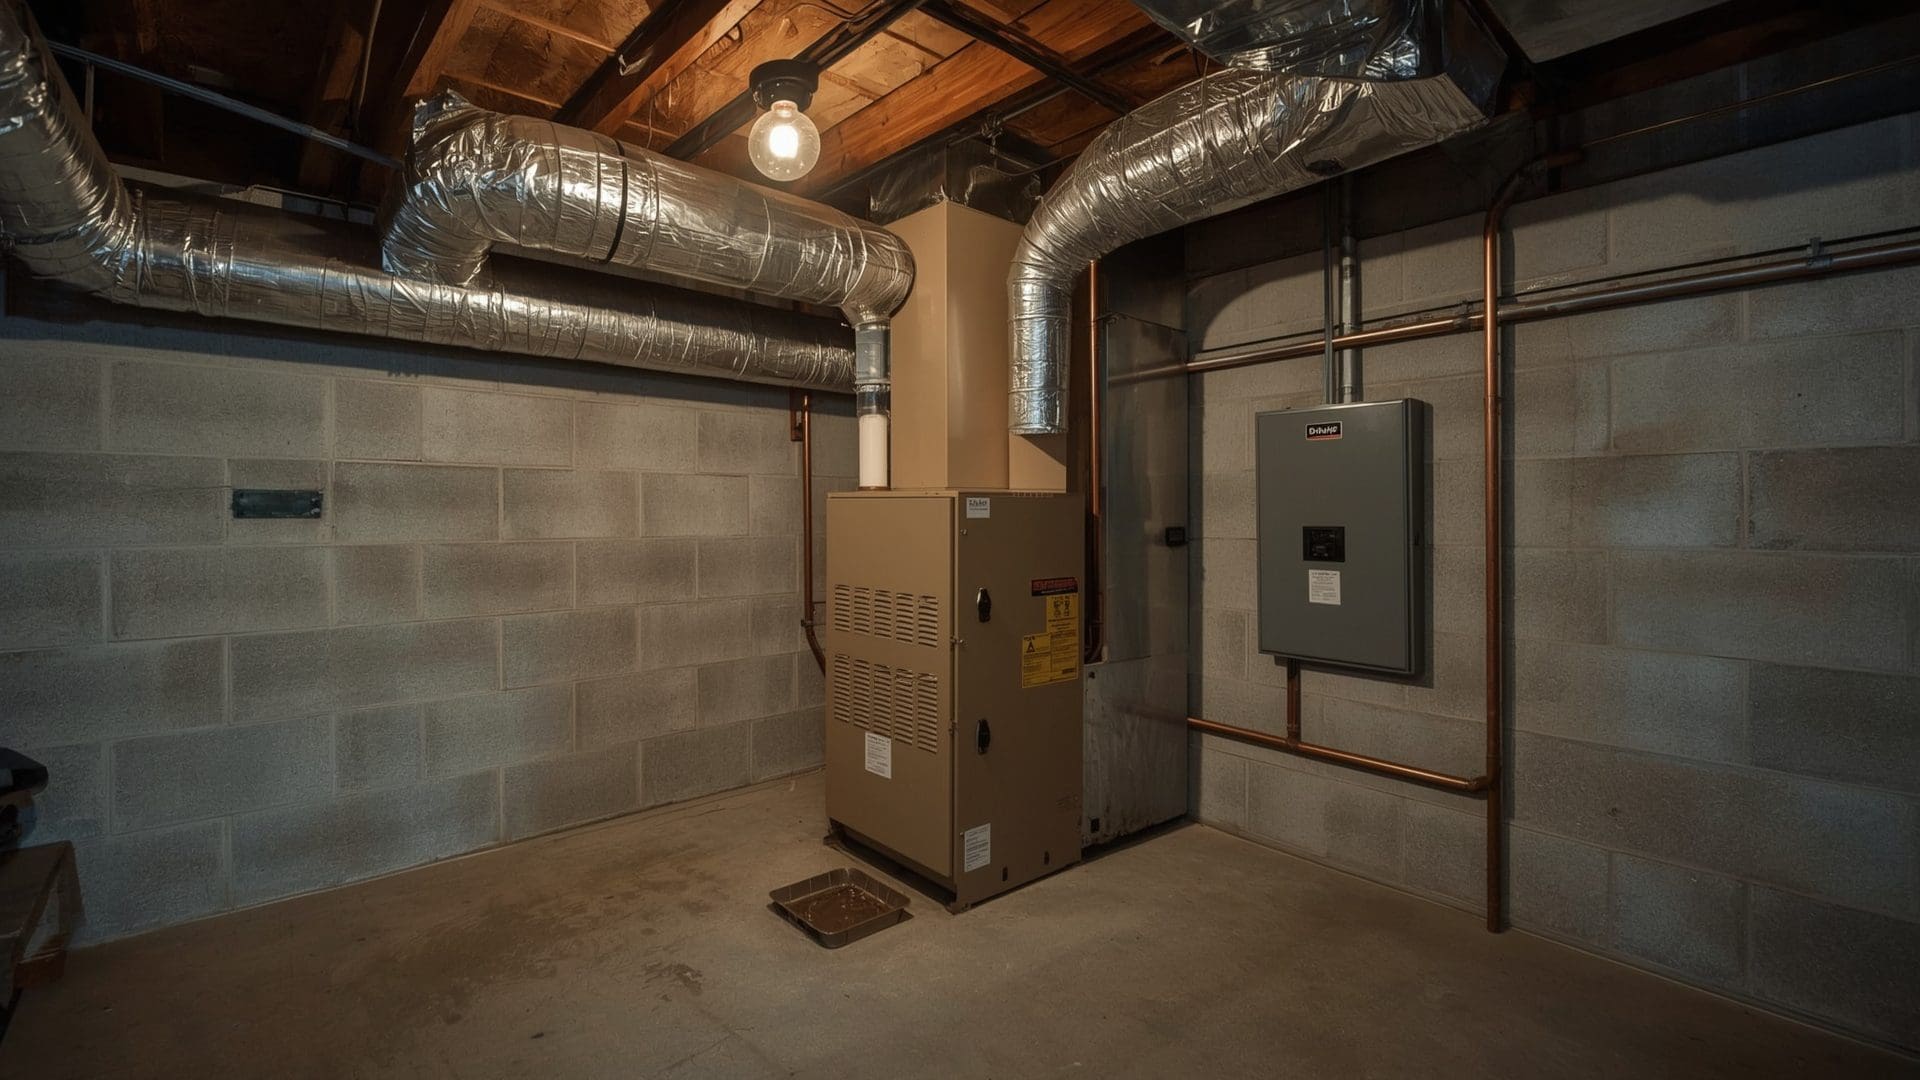
If fresh batteries do not revive the display, the problem is likely on the power supply side. Many thermostats receive 24-volt power from the HVAC system’s transformer in addition to battery backup. A tripped breaker or a blown 3-amp fuse on the furnace control board cuts that power.
Power Supply Checklist
- Check the circuit breaker labeled “HVAC,” “Furnace,” or “AC” in your electrical panel.
- Look for a power switch on or near your furnace (it looks like a regular light switch).
- Inspect the 3-amp or 5-amp fuse on the furnace control board, if accessible.
- Verify that the R-wire (red, 24V power) is securely connected at the thermostat base.
If the breaker keeps tripping after you reset it, stop troubleshooting and call a technician. Repeated tripping signals an electrical fault in the HVAC system, not a thermostat problem.
What Causes a Thermostat to Show the Wrong Temperature?
Quick Answer: Incorrect temperature readings come from poor thermostat placement, calibration drift, or dust on the internal sensor. A thermostat mounted near a heat source, drafty window, or exterior wall can read 3°F to 5°F higher or lower than your actual room temperature.
Your thermostat measures the air temperature at its specific location, not the average temperature of your entire home. That distinction matters. If the thermostat sits on a wall that gets direct afternoon sunlight, it reads warmer than the room actually is. Your AC then overcools the rest of the house trying to satisfy a number that was inflated by solar heat.
Common Placement Problems
| Problem Location | Temperature Impact | Resulting HVAC Behavior |
|---|---|---|
| Near a sunny window | Reads 3°F to 5°F high | AC overcools the house |
| Above a heat register | Reads 2°F to 4°F high | Heating shuts off too early |
| On an exterior wall | Reads 2°F to 3°F low in winter | Furnace runs excessively |
| Near a kitchen or oven | Reads 3°F to 6°F high during cooking | AC cycles on unnecessarily |
| In a hallway with poor airflow | Reads 1°F to 3°F off from living areas | Uneven heating and cooling |
| Near a bathroom door | Reads 2°F to 4°F high after showers | AC activates from steam heat |
The ideal thermostat location is on an interior wall, roughly 5 feet off the floor, away from direct sunlight, vents, doors, and kitchens. Relocating a thermostat costs $100 to $250 when done by an electrician or HVAC tech, and it permanently fixes ghost readings.
How Do You Calibrate a Thermostat That Reads Incorrectly?
Quick Answer: Place a reliable standalone thermometer next to your thermostat for 15 minutes and compare readings. If they differ by more than 1°F, your thermostat needs calibration. Some digital models have a built-in calibration offset setting. Mechanical models need manual adjustment with a small screwdriver.
Calibration drift happens when the internal temperature sensor gradually loses accuracy. This is normal, especially for thermostats older than five years. Mechanical thermostats with bimetallic coil sensors drift more than digital models with electronic thermistors.
Digital Thermostat Calibration
- Place a digital room thermometer (accurate to ±0.5°F) on the wall next to your thermostat.
- Wait 15 minutes for both readings to stabilize.
- Note the difference between the two readings.
- Access your thermostat’s settings menu and look for “calibration,” “offset,” or “temperature correction.”
- Enter the offset value. For example, if your thermostat reads 73°F but the room is actually 71°F, enter a negative 2°F offset.
Not every thermostat has a calibration setting. Budget models and some older programmable units lack this feature. If yours does not have it and the reading is off by more than 2°F, replacement is the practical solution.
Mechanical Thermostat Calibration
Older mercury-bulb or bimetallic coil thermostats have a small calibration screw or lever behind the faceplate. Turn it in tiny increments (no more than one-eighth of a turn at a time), wait 15 minutes, and recheck. This requires patience and a steady hand. Many homeowners find it easier to simply upgrade to a digital model, which typically costs $25 to $75 for a basic programmable unit.
Why Does My Thermostat Keep Losing Its Programmed Schedule?
Quick Answer: Programmable thermostats lose their schedules when batteries die, power interruptions occur, or firmware glitches corrupt the saved settings. Replace batteries annually and check if your model has a “schedule lock” or memory backup feature to prevent resets.
Losing your schedule is frustrating, especially if you spent 20 minutes programming wake, leave, return, and sleep temperatures. The most common culprit is a battery that drops below the threshold needed to maintain memory. Some thermostats use batteries solely for memory backup while running on 24V HVAC power. When those batteries die, the schedule vanishes even though the screen stays lit.
Programming Errors vs. Hardware Failures
| Symptom | Likely Cause | Fix |
|---|---|---|
| Schedule resets after power outage | No battery backup installed | Install or replace backup batteries |
| Schedule runs but at wrong times | Incorrect clock or time zone setting | Reset the clock and verify AM/PM |
| Only one period saves, rest revert | User error during programming | Follow manufacturer steps exactly; confirm each period before advancing |
| Schedule works for days then resets | Dying batteries losing memory | Replace batteries immediately |
| Random temperature changes | Firmware glitch or button malfunction | Factory reset the thermostat |
| Smart thermostat overrides your schedule | Learning algorithm or eco mode active | Disable “auto-schedule” or “eco” in the app |
Smart thermostats like the Nest Learning Thermostat and Ecobee SmartThermostat add another layer. These devices use occupancy sensors and learning algorithms to adjust your schedule automatically. If you set 70°F but the thermostat drops to 65°F while you are home, it is likely an “eco” or “away” mode overriding your preference. Disable these features in the app settings if they conflict with your comfort.
What Does Short Cycling Mean and Is My Thermostat Causing It?
Quick Answer: Short cycling is when your HVAC system turns on and off every 2 to 5 minutes instead of running full 10 to 15 minute cycles. A thermostat can cause this through incorrect anticipator settings, placement too close to a vent, or a stuck relay. However, short cycling can also signal a refrigerant leak or oversized HVAC unit.
Short cycling wastes energy, wears out compressor and blower components faster, and leaves your home at inconsistent temperatures. When the thermostat is the cause, the fix is usually straightforward.
Thermostat-Related Short Cycling Causes
- Heat anticipator set too low — older mechanical thermostats have a small lever on the anticipator dial. If set too low, the thermostat shuts off the furnace prematurely. Nudge it 0.1 amps higher and test.
- Differential (deadband) too narrow — digital thermostats have a temperature differential, usually 0.5°F to 2°F. If set to 0.5°F, the system cycles constantly. Increase it to 1°F or 1.5°F.
- Thermostat near a supply vent — hot or cold air blowing directly on the sensor causes rapid temperature swings, triggering short cycling between heating and cooling.
- Loose wiring at the thermostat base — intermittent contact on the Y-wire (cooling) or W-wire (heating) mimics rapid on/off signals.
If adjusting these factors does not solve the problem, the short cycling likely originates in the HVAC equipment itself. Oversized air conditioners and furnaces short cycle by design because they reach the target temperature too quickly for the space they serve. A technician can confirm whether your equipment is properly sized.
How Do You Fix a Thermostat That Will Not Turn On the AC or Heat?
Quick Answer: When a thermostat displays normally but your AC or furnace will not respond, check that the system switch is set to the correct mode, the fan is set to “auto,” and the set temperature is at least 3°F above or below room temperature. Then inspect the wiring at the thermostat base for loose or disconnected wires.
This is one of the trickiest symptoms because the thermostat looks fine on the surface. The screen is lit, the temperature reads correctly, but nothing happens when you adjust the settings.
Systematic Troubleshooting Steps
- Confirm the mode switch: “Cool” for AC, “Heat” for furnace, not “Off” or “Fan Only.”
- Set the target temperature at least 3°F away from the current reading to trigger a call for heating or cooling.
- Wait 5 minutes. Many thermostats have a built-in compressor delay (typically 5 minutes) to protect the AC compressor from rapid restarts.
- Listen for a click at the thermostat when you change the setting. A click means the relay is activating. No click means the thermostat is not sending the signal.
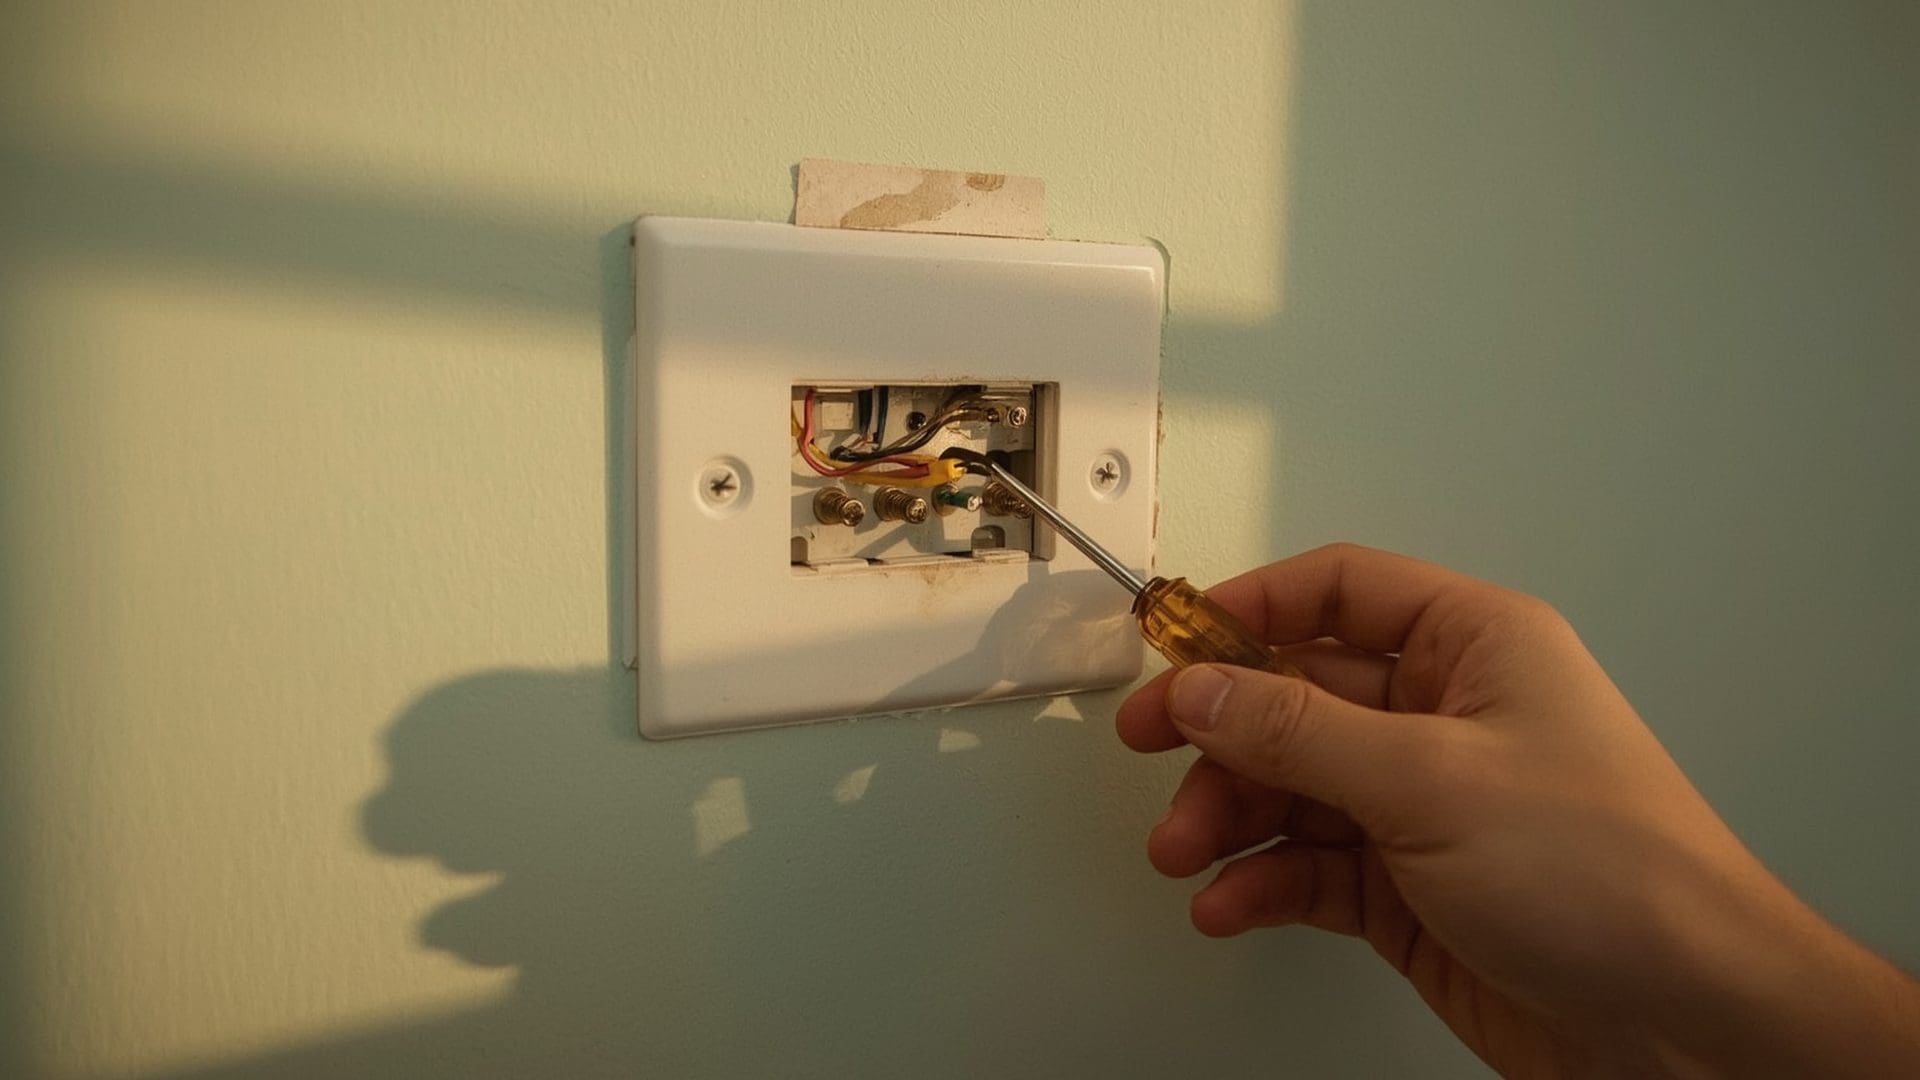
- Remove the thermostat from the wall and inspect the wire connections at the base plate.
- Verify color-coded wiring: R (red, power), W (white, heat), Y (yellow, cooling), G (green, fan), C (blue, common).
Wiring Color Code Reference
| Wire Color | Terminal Label | Function | What Happens If Loose |
|---|---|---|---|
| Red | R, Rh, or Rc | 24V power supply | Blank screen or no response |
| White | W or W1 | Heating call | Furnace will not turn on |
| Yellow | Y or Y1 | Cooling call | AC will not turn on |
| Green | G | Fan control | Blower fan will not activate |
| Blue | C | Common (completes 24V circuit) | Intermittent power, Wi-Fi drops on smart thermostats |
| Orange | O or B | Heat pump reversing valve | Heat pump stuck in one mode |
If a wire is disconnected or corroded, push it firmly into the correct terminal and tighten the screw. Corroded wire ends should be stripped back 1/4 inch to expose fresh copper before reconnecting.
Can Dust and Dirt Inside a Thermostat Cause Problems?
Quick Answer: Yes. Dust accumulation on the internal sensor, contacts, or circuit board causes inaccurate readings, erratic behavior, and failed signals. Gently cleaning the interior with compressed air or a soft brush every 12 months prevents most dust-related thermostat malfunctions.
Open a thermostat that has been on the wall for five years and you will likely find a thin film of dust coating the sensor and circuit board. This dust insulates the temperature sensor, causing it to react slower and read higher or lower than actual room temperature.
Safe Cleaning Method
- Turn off the HVAC system at the thermostat and the breaker.
- Remove the thermostat faceplate from the wall plate.
- Use a can of compressed air held 6 inches away to blow dust off the sensor and contacts.
- For stubborn buildup, use a soft-bristle artist’s paintbrush to gently sweep debris.
- Never use water, chemical cleaners, or abrasive cloths on thermostat internals.
- Reattach the faceplate and restore power.
Mechanical thermostats with exposed contact points benefit the most from cleaning. If the bimetallic coil contacts are dirty, the thermostat may fail to complete the circuit even when the set temperature is reached. A gentle wipe with a soft cloth across those contact points often restores normal operation.
Why Does My Thermostat Read a Different Temperature Than My Thermometer?
Quick Answer: Temperature discrepancies between your thermostat and a standalone thermometer happen because of sensor location differences, calibration drift, or air stratification. Warm air rises, so a thermostat at 5 feet reads differently than a thermometer at 3 feet. A 1°F to 2°F difference is normal; anything beyond 3°F needs attention.
Air stratification is the natural tendency of warm air to rise and cool air to sink. In a room with 8-foot ceilings, the temperature near the ceiling can be 4°F to 6°F warmer than near the floor. Your thermostat at 5 feet reads a different slice of that gradient than a tabletop thermometer at 3 feet.
Before assuming your thermostat is wrong, place your standalone thermometer at the exact same height and within 6 inches of the thermostat. Wait 15 minutes. If they still disagree by more than 2°F, your thermostat sensor is likely drifting and needs calibration or replacement.
When Should You Replace a Thermostat Instead of Repairing It?
Quick Answer: Replace your thermostat when it is more than 10 years old, requires repeated troubleshooting, has no calibration offset feature, lacks compatibility with your current HVAC equipment, or when repair costs approach the $50 to $250 price of a new unit.
Thermostat technology has advanced significantly. If your unit is a basic non-programmable model from 2015 or earlier, upgrading to a smart thermostat or modern programmable unit delivers real benefits.
Thermostat Replacement Decision Guide
| Factor | Keep and Repair | Replace |
|---|---|---|
| Age | Under 8 years | Over 10 years |
| Issue frequency | First-time problem | Third or more malfunction |
| Repair cost | Under $50 | Over $75 (new units start at $25) |
| Energy features | Already programmable | Non-programmable or no Wi-Fi |
| HVAC compatibility | Matches system (forced air furnace, AC, heat pump system) | Incompatible with new equipment |
| C-wire availability | C-wire present | No C-wire (some smart models need an add-a-wire kit, $15 to $30) |
Upgrading to a smart thermostat can save 10% to 15% on heating and cooling costs annually, according to Energy Star. For a home spending $2,000 per year on energy, that is $200 to $300 in annual savings, which pays back a $150 to $250 thermostat investment in under two years.
How Do You Know If the Problem Is the Thermostat or the HVAC System?
Quick Answer: Bypass the thermostat by carefully connecting the R-wire to the W-wire (for heat) or the R-wire to the Y-wire (for cooling) at the thermostat base. If the HVAC system starts, the thermostat is the problem. If nothing happens, the issue is in the HVAC equipment itself.
This bypass test is the fastest way to isolate the source of the problem. It works because the thermostat is essentially a switch. When it calls for heating, it connects the R-wire to the W-wire, completing a 24V circuit that tells the furnace to fire. Bridging those wires manually does the same thing.
Safety Precautions for the Bypass Test
- Only touch the low-voltage thermostat wires (24V), never the high-voltage wiring in the HVAC unit itself.
- Turn off power at the breaker before handling wires.
- Use insulated pliers or wire nuts, not bare fingers.
- Run the bypass for only 2 to 3 minutes to confirm the system activates, then disconnect.
- If you are uncomfortable with electrical work, skip this test and call a licensed HVAC technician.
If your HVAC system runs nonstop during the bypass test and does not shut off, that is normal. You removed the “off switch” (the thermostat), so the system has no signal telling it to stop. Disconnect the wires promptly.
What Are the Most Common Smart Thermostat Problems?
Quick Answer: Smart thermostats face Wi-Fi disconnections, app sync failures, ghost schedule changes from learning algorithms, and C-wire power issues that basic models do not. Most of these resolve through a router reboot, app update, or disabling auto-learning features in the thermostat settings.
Smart thermostats bring convenience but add complexity. The most common complaint is that the thermostat changes temperature on its own. This usually is not a malfunction. Devices like the Nest, Ecobee, and Honeywell Home T9 use occupancy sensors and machine learning to adjust your schedule based on when you are home or away.
Smart Thermostat Troubleshooting
- Wi-Fi keeps dropping — move your router closer or add a Wi-Fi extender. Smart thermostats need consistent 2.4 GHz signal strength above negative 70 dBm.
- Thermostat goes offline in the app — reboot the thermostat by pulling it off the base for 30 seconds, then reattach. Also reboot your router.
- Ghost temperature changes — disable “Auto Schedule,” “Learning,” or “Eco” modes in the app. Set your schedule manually.
- Battery drains quickly or screen flickers — the C-wire (common wire) may be missing or not connected. Without it, the thermostat tries to “power steal” from other wires, causing instability. Install a C-wire adapter kit for $15 to $30.
- Software update caused new issues — check the manufacturer’s support page for known bugs. Roll back to a previous firmware version if the option exists.
If you are considering upgrading to a smart thermostat, verify compatibility first. Heat pump systems, multi-stage furnaces, and dual-fuel setups require thermostats with specific wiring terminals and software support. The wrong thermostat can cause the reversing valve to malfunction or lock out stages of heating.
Does Thermostat Placement Affect HVAC Efficiency?
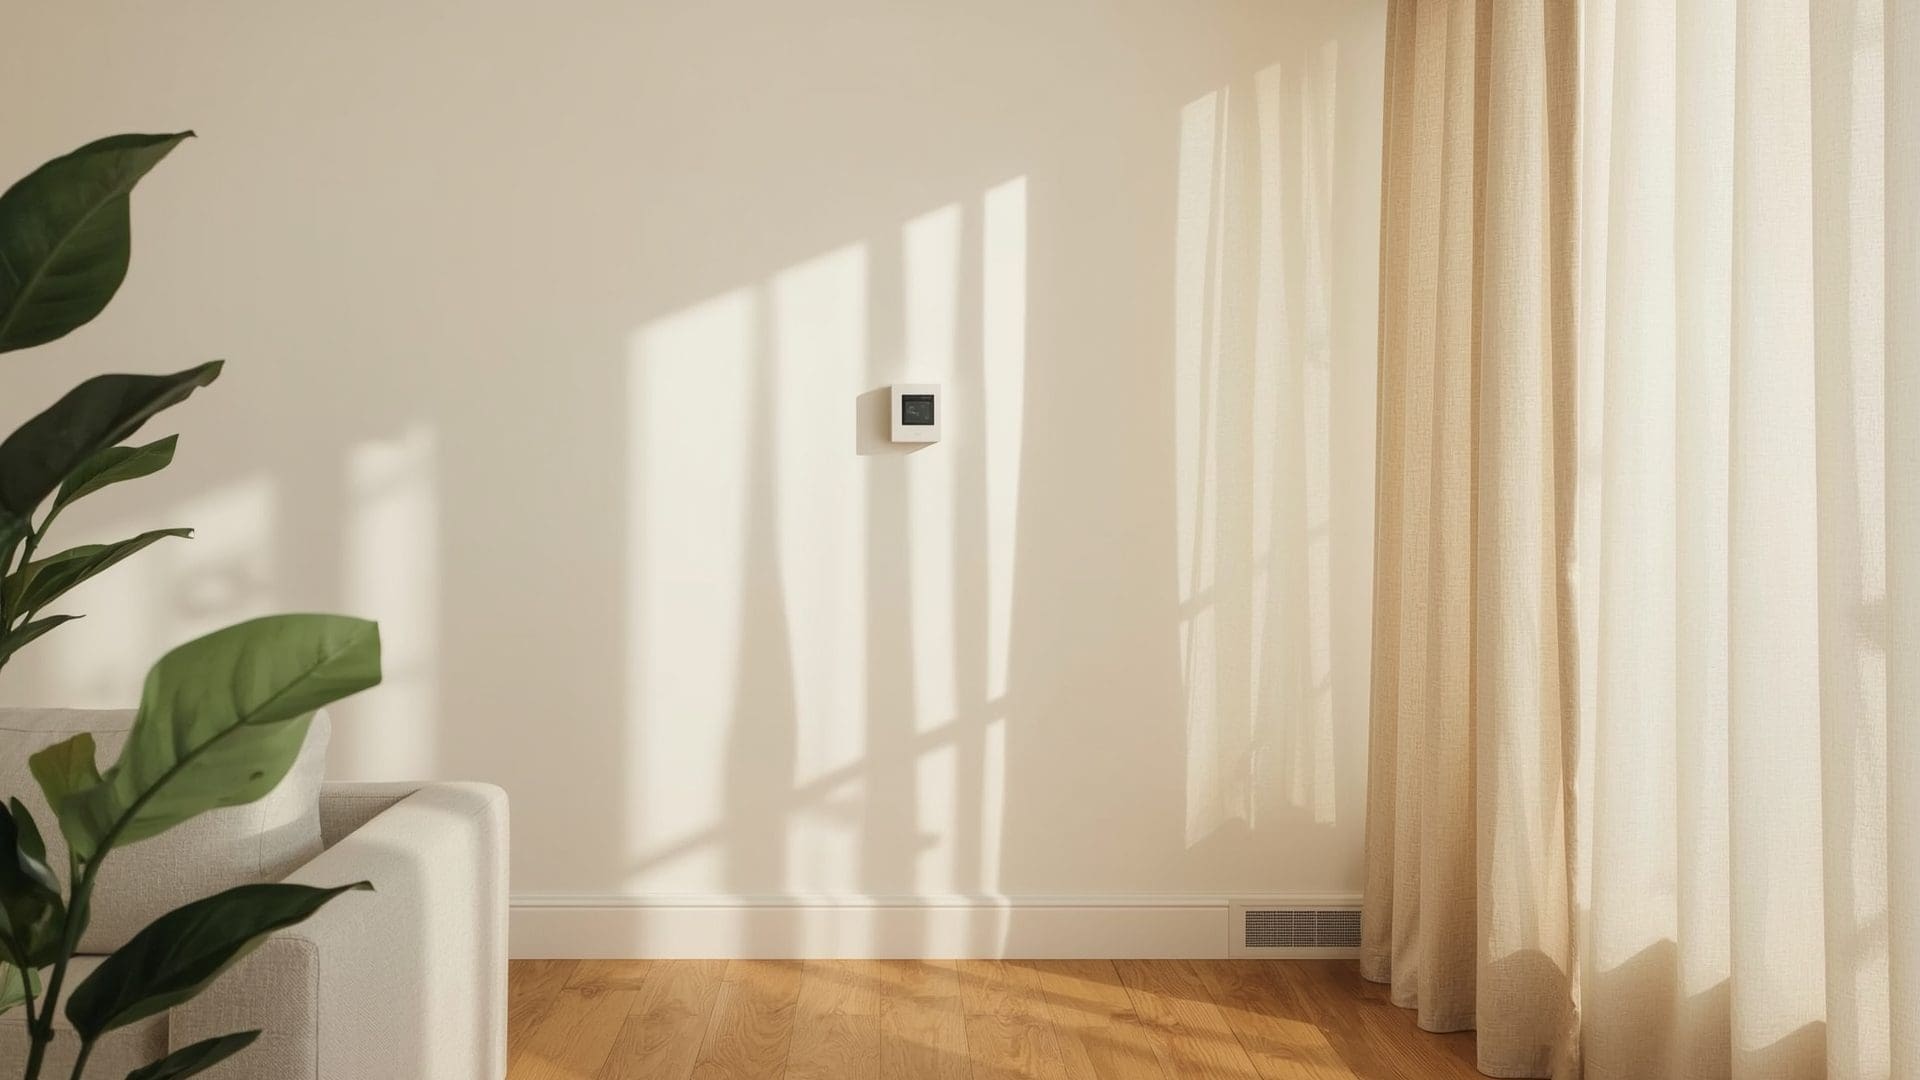
Quick Answer: Absolutely. A poorly placed thermostat can increase energy bills by 10% to 20% because the HVAC system heats or cools based on a misleading temperature reading. The ideal location is an interior wall in a frequently used room, 52 to 60 inches off the floor, away from windows, vents, and appliances.
Think of thermostat placement like putting a speedometer on the wrong wheel of a car. The reading might be technically accurate for that one spot, but it does not represent the actual experience. Your HVAC system responds to what the thermostat reports, not what you feel in the living room.
Ideal vs. Problematic Placement
The best location is on an interior wall of the room where your family spends the most time. Avoid hallways, which often have different airflow patterns than occupied rooms. Avoid walls shared with garages, attics, or unconditioned spaces, as heat transfer through the wall affects the sensor.
If relocating the thermostat is not practical, consider a model with remote room sensors. The Ecobee SmartThermostat and similar devices use wireless sensors placed in different rooms to average the temperature across your home. This compensates for poor thermostat placement without running new wiring.
How Often Should You Test and Maintain Your Thermostat?
Quick Answer: Test your thermostat at the start of each heating and cooling season, twice per year. Replace batteries annually, clean the interior once a year, and verify temperature accuracy with a standalone thermometer every six months. This 15-minute maintenance routine prevents most thermostat failures.
Seasonal Thermostat Maintenance Schedule
| Task | Frequency | Time Required | Tools Needed |
|---|---|---|---|
| Replace batteries | Every 12 months | 2 minutes | AA or AAA batteries |
| Clean interior with compressed air | Every 12 months | 5 minutes | Compressed air can |
| Verify temperature accuracy | Every 6 months | 15 minutes | Standalone digital thermometer |
| Test heating mode | Every fall (September/October) | 5 minutes | None |
| Test cooling mode | Every spring (March/April) | 5 minutes | None |
| Check and tighten wire connections | Every 2 years | 10 minutes | Small screwdriver |
| Update firmware (smart models) | As available | 5 minutes | Wi-Fi connection |
Seasonal testing catches problems before they leave you without heat on a freezing night or without AC on the hottest day of summer. Set a calendar reminder for early September and early March.
What Should You Do If None of These Fixes Work?
Quick Answer: If you have replaced batteries, checked wiring, verified placement, cleaned the unit, and tested the bypass without success, call a licensed HVAC technician. The issue may be a failed transformer, a control board malfunction, or zone damper problems that require professional diagnosis and tools.
Some problems are beyond DIY scope. A dead transformer, a failed zone control panel, or a wiring fault buried inside the wall requires a professional with a multimeter and HVAC training.
When to Call a Professional
- The bypass test shows the HVAC system does not respond at all.
- You smell burning or see scorch marks near the thermostat wiring.
- The circuit breaker keeps tripping when the HVAC system tries to start.
- Your system has zone dampers or a multi-zone setup with multiple thermostats.
- You recently installed new HVAC equipment and the old thermostat is not compatible.
- Your home has aluminum wiring (common in homes built between 1965 and 1973), which requires special connectors.
A professional HVAC diagnostic visit typically costs $75 to $150. Thermostat replacement labor runs $50 to $100 on top of the unit cost. For most homeowners, the total cost of resolving a thermostat issue professionally stays under $300.
Frequently Asked Questions
Can a bad thermostat increase my energy bill?
Yes. A thermostat reading 3°F too low in winter forces your furnace to run longer than needed. That single error can add 8% to 12% to your heating bill. Calibrating or replacing a faulty thermostat often pays for itself within one season.
Is it safe to install a thermostat yourself?
For most standard systems, yes. Thermostat wiring carries only 24 volts, which is not dangerous. Turn off the breaker first, label your wires before disconnecting the old unit, and follow the new thermostat’s wiring diagram. If your system uses high-voltage line (120V or 240V baseboard heat), hire an electrician.
Why does my thermostat click but nothing happens?
The click means the thermostat relay is sending a signal to the HVAC system. If the system does not respond, the problem is downstream. Check the circuit breaker, the furnace power switch, and the condensate drain safety switch. A full condensate pan shuts down the system as a safety measure on many AC units.
How long do thermostats typically last?
Mechanical thermostats can last 20 to 30 years. Digital programmable models last 10 to 15 years. Smart thermostats average 8 to 12 years, partly because software updates eventually stop and technology moves forward. Budget for replacement every decade if you use a digital or smart model.
Do I need a C-wire for a new smart thermostat?
Most smart thermostats work best with a C-wire (common wire) providing continuous 24V power. Without it, features like Wi-Fi and display brightness drain the system. If your home lacks a C-wire, use an add-a-wire adapter kit ($15 to $30) or choose a model like the Nest Thermostat that can function without one through power stealing.
Can a thermostat cause uneven temperatures between rooms?
Indirectly, yes. If the thermostat is in the warmest room, the rest of the house will be undercooled. If it is in the coldest room, other rooms get overcooled. A thermostat with remote room sensors or a zoned HVAC system solves uneven temperature distribution across multiple rooms.